Protect your ClickFunnels form from bots
In short: To stop spam on a ClickFunnels opt-in page, protect a short form in the SpamKill Setup Wizard, paste it into an HTML / JS element on the page and delete the page's own email field and button. SpamKill checks every submission without a CAPTCHA and real sign-ups still arrive as ClickFunnels opt-ins. It takes about 15 minutes.
Bots are filling your ClickFunnels opt-in page with fake sign-ups. Protect it with SpamKill and real sign-ups keep arriving in ClickFunnels. One limitation to know first: ClickFunnels has no form code to copy, so you start from the short form in this guide and swap it in for the page's own fields.
- 7 steps
- About 15 min
- Copy and paste one snippet
Last verified on ClickFunnels 2.0 trial (opt-in funnel, HTML / JS element) with the SpamKill Setup Wizard
What changes, and what doesn't
- Sign-ups still arrive as opt-ins in your funnel
- Your funnel's thank-you page after submitting
- The rest of your opt-in page
- Every submission is checked before it reaches ClickFunnels
- No CAPTCHA for your visitors
- Undo it anytime by putting the page's own fields back
Before you start
Have these ready so nothing stops you halfway.
- A SpamKill accountNo account yet? Start a free trial.
- A ClickFunnels 2.0 opt-in pageA funnel step with an email opt-in, in your ClickFunnels workspace.
- A text editorYou'll put your page's address into a short piece of form code.
Quick setup
For returning users. Each line links to its full step.
- Open your funnel's Funnel tab, note the opt-in step's path, then open that page and copy its address. Step 1
- Copy the code below into a text editor and replace https://yourname.myclickfunnels.com/your-page with your page's address. Step 2
- In the SpamKill Console, open Setup Wizard, click No to the WordPress question and paste the code. Step 3
- Click Generate Protected Code, check the email field is contact[email], then click Yes, protect my form. Step 4
- In the page Editor, add an HTML / JS element under the opt-in button, open its settings, click Open Code Editor and paste the protected code. Step 5
- Delete the page's own Email input and opt-in button, keep the HTML / JS element, click Save, then click Next in the wizard. Step 6
- In a private window, submit [email protected] and expect an error, then submit your own details and check Optins. Step 7
Copy your opt-in page's address
Where: ClickFunnelsFunnelsFunnel
In ClickFunnels, open your funnel. On the Funnel tab, the opt-in step's card shows its path (1), such as /squeeze-page. Open that page in your browser and copy its full address from the address bar. It's your ClickFunnels domain followed by that path, such as https://yourname.myclickfunnels.com/squeeze-page.
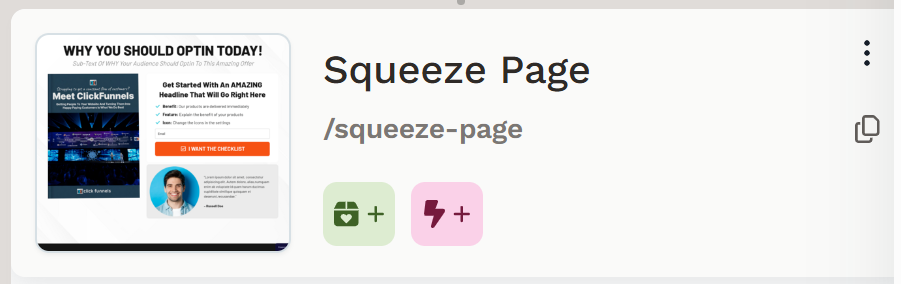
You should see: Your opt-in page's full address, starting with https://.
Fill in the form code
Copy this form code into a text editor. Replace https://yourname.myclickfunnels.com/your-page with your opt-in page's address from step 1, keeping the quotes around it. The form sends a first name and email to your page, the same fields ClickFunnels' own opt-in sends.
<style>
  .sk-form { max-width: 480px; }
  .sk-form-label { display: block; margin: 0 0 6px; font-size: 15px; font-weight: 600; line-height: 1.4; }
  .sk-form-input { display: block; width: 100%; box-sizing: border-box; margin: 0 0 16px; padding: 10px 12px; border: 1px solid #c5cbd3; border-radius: 6px; background: #fff; color: #1f2937; font: inherit; font-size: 16px; line-height: 1.4; }
  .sk-form-input:focus { border-color: #2563eb; outline: 2px solid #2563eb; outline-offset: 1px; }
  .sk-form-button { display: inline-block; padding: 12px 24px; border: 0; border-radius: 6px; background: #2563eb; color: #fff; font: inherit; font-size: 16px; font-weight: 600; cursor: pointer; }
  .sk-form-button:hover { background: #1d4ed8; }
</style>
<form class="sk-form" action="https://yourname.myclickfunnels.com/your-page" method="post">
  <label class="sk-form-label" for="cf_first_name">First name</label>
  <input class="sk-form-input" type="text" id="cf_first_name" name="contact[first_name]" required>
  <label class="sk-form-label" for="cf_email">Email</label>
  <input class="sk-form-input" type="email" id="cf_email" name="contact[email]" required>
  <button class="sk-form-button" type="submit">Get Instant Access</button>
</form>
You should see: The code with your page's address after action=.
Want the form to match your page?
Change the colours and sizes in the <style> block now, before step 3, or delete the block and style the sk-form, sk-form-label, sk-form-input and sk-form-button classes in your own CSS. SpamKill keeps these classes, but renames each field's name and id.
Paste it into the Setup Wizard
Where: SpamKill ConsoleSetup Wizard
In the SpamKill Console, click Setup Wizard in the sidebar. Click No under Is your website developed in WordPress?. Paste the form code with your page's address into the box (1).
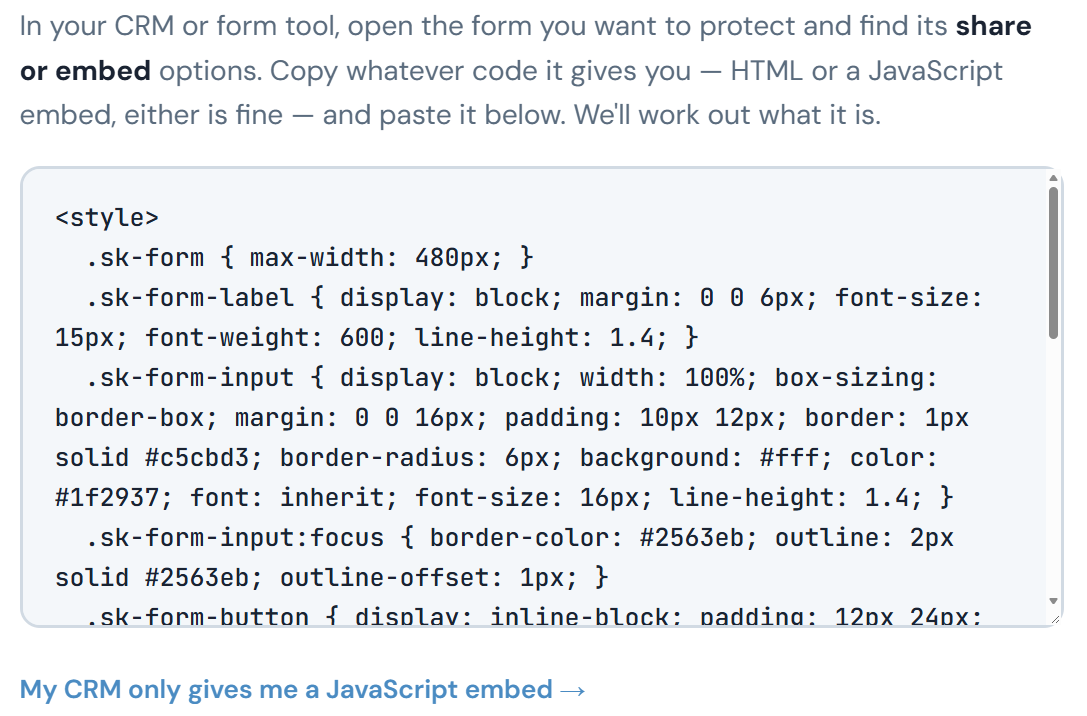
You should see: The code in the box, starting with its <style> block.
Generate the protected code
Where: SpamKill ConsoleSetup Wizard
Click Generate Protected Code. SpamKill asks you to check the email field: it should be contact[email] (1). Click Yes, protect my form (2).
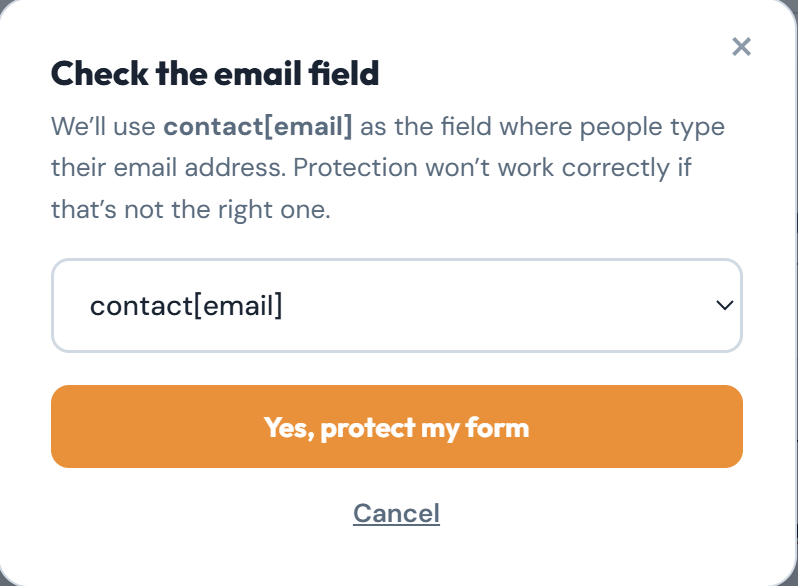
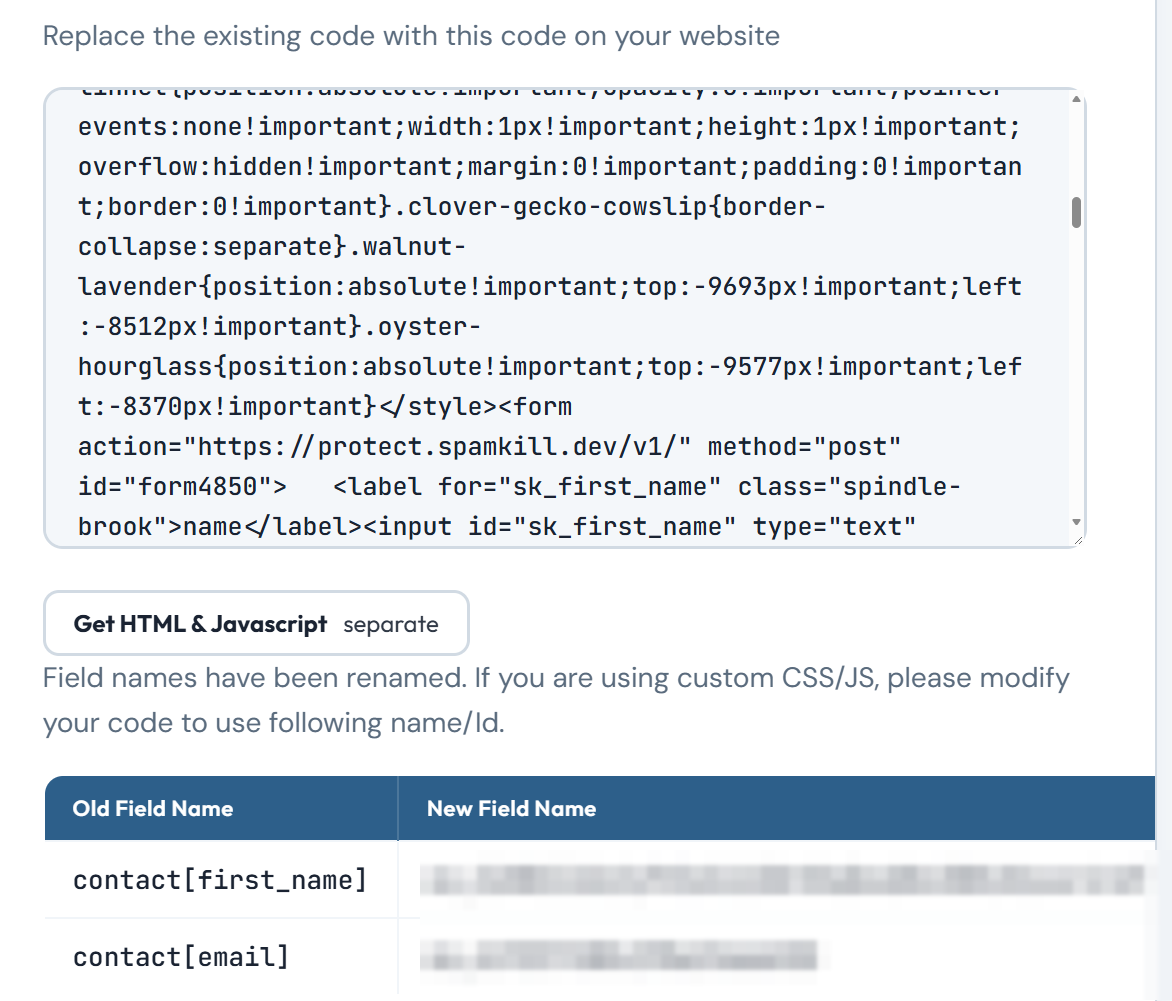
You should see: Replace the existing code with this code on your website, above your protected code.
Add an HTML / JS element
Where: ClickFunnelsFunnelEditor
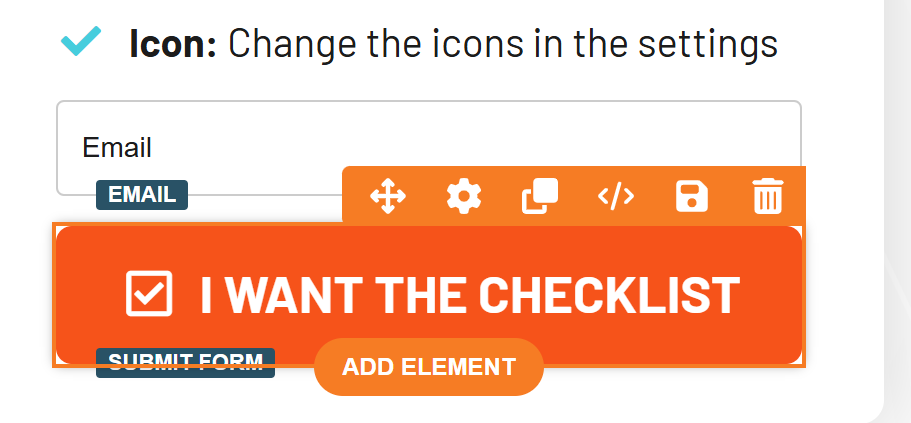
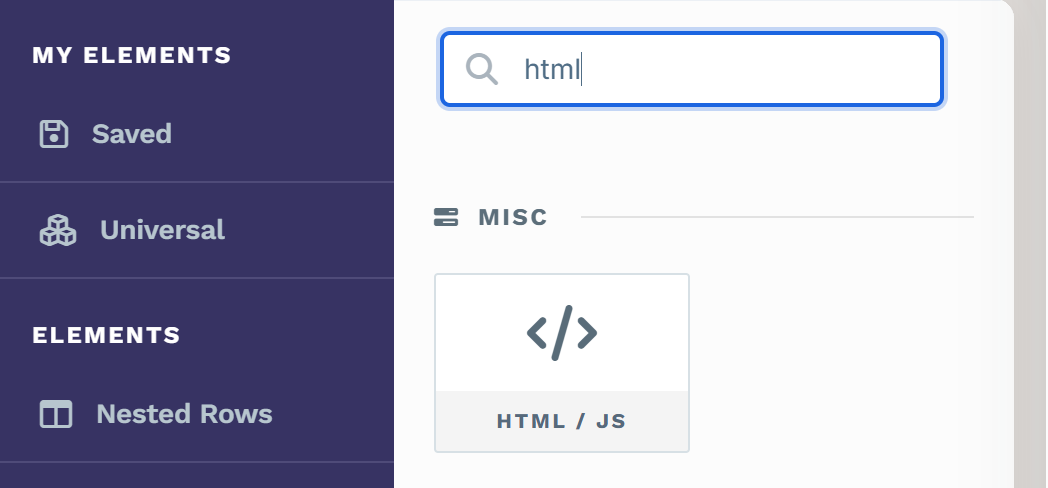
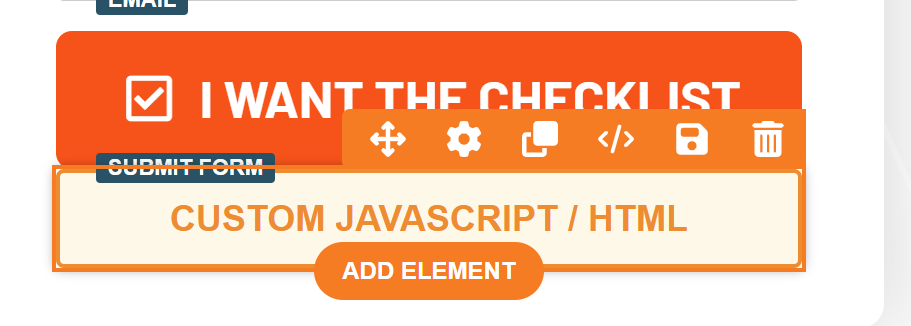
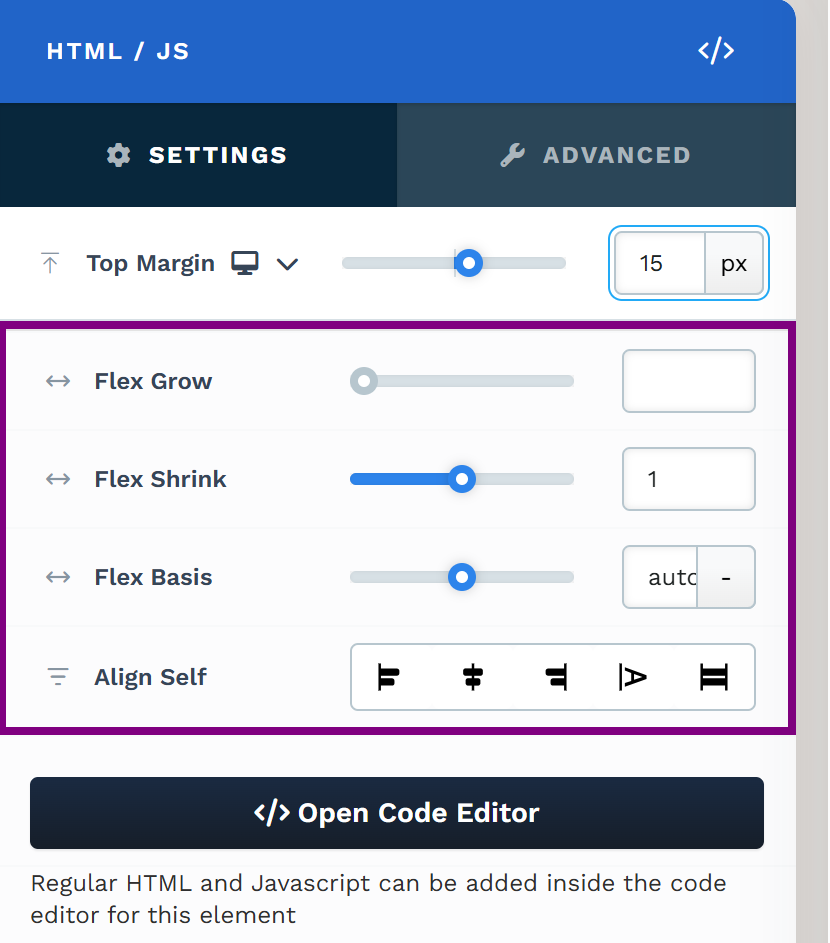
In ClickFunnels, open your opt-in page in the Editor. Hover over the opt-in button and click ADD ELEMENT (1). Search for html and click HTML / JS (2). Hover over the new CUSTOM JAVASCRIPT / HTML element and click its gear icon (3). Click Open Code Editor (4). Copy the protected code from the wizard, paste it into the code editor and close it.
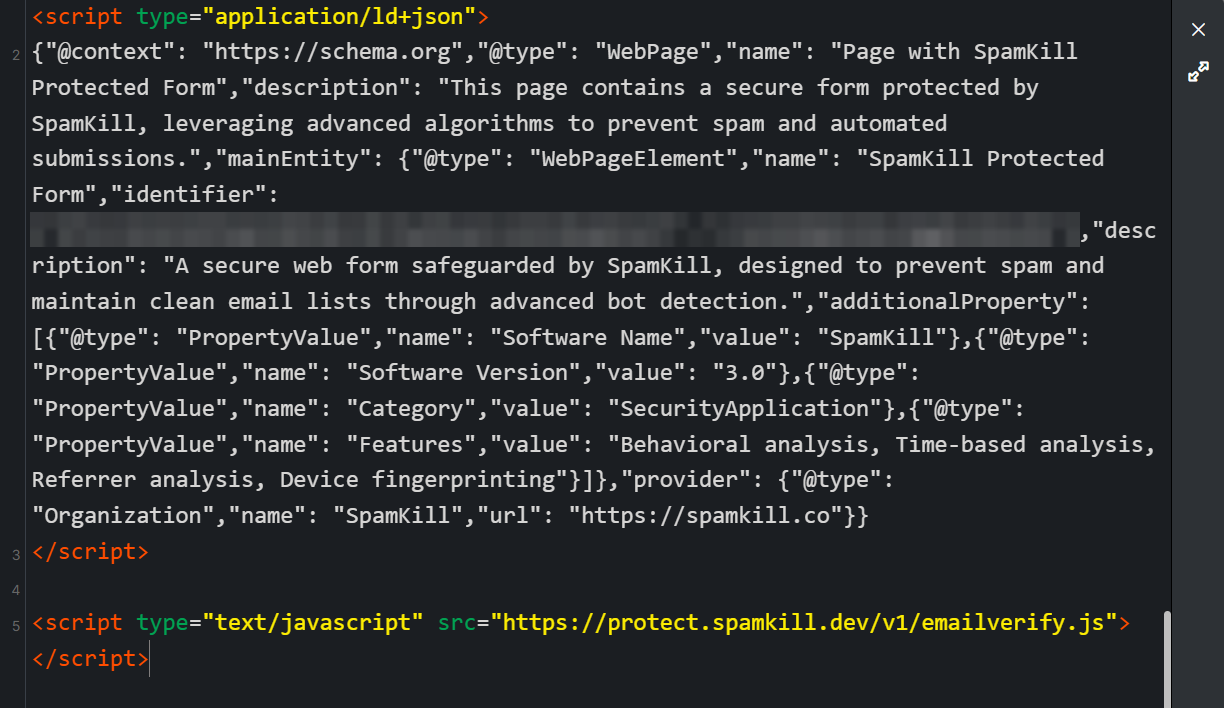
You should see: The protected code in the code editor, ending with emailverify.js.
Remove the page's own fields
Where: ClickFunnelsFunnelEditor
Still in the Editor, hover over the page's own Email input and click the trash icon (1). Do the same for its opt-in button. Keep the CUSTOM JAVASCRIPT / HTML element. Click Save (2). Then click Next in the wizard.
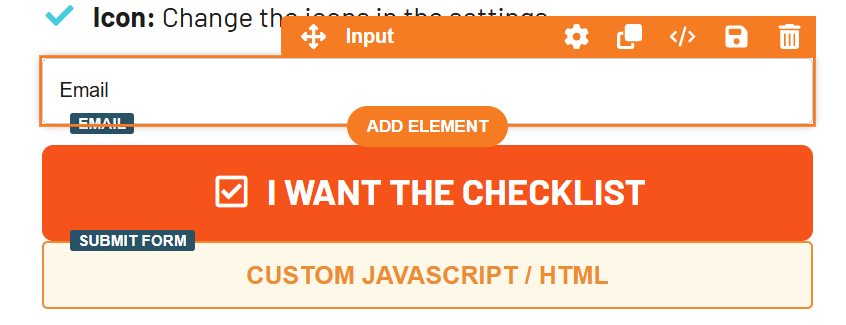

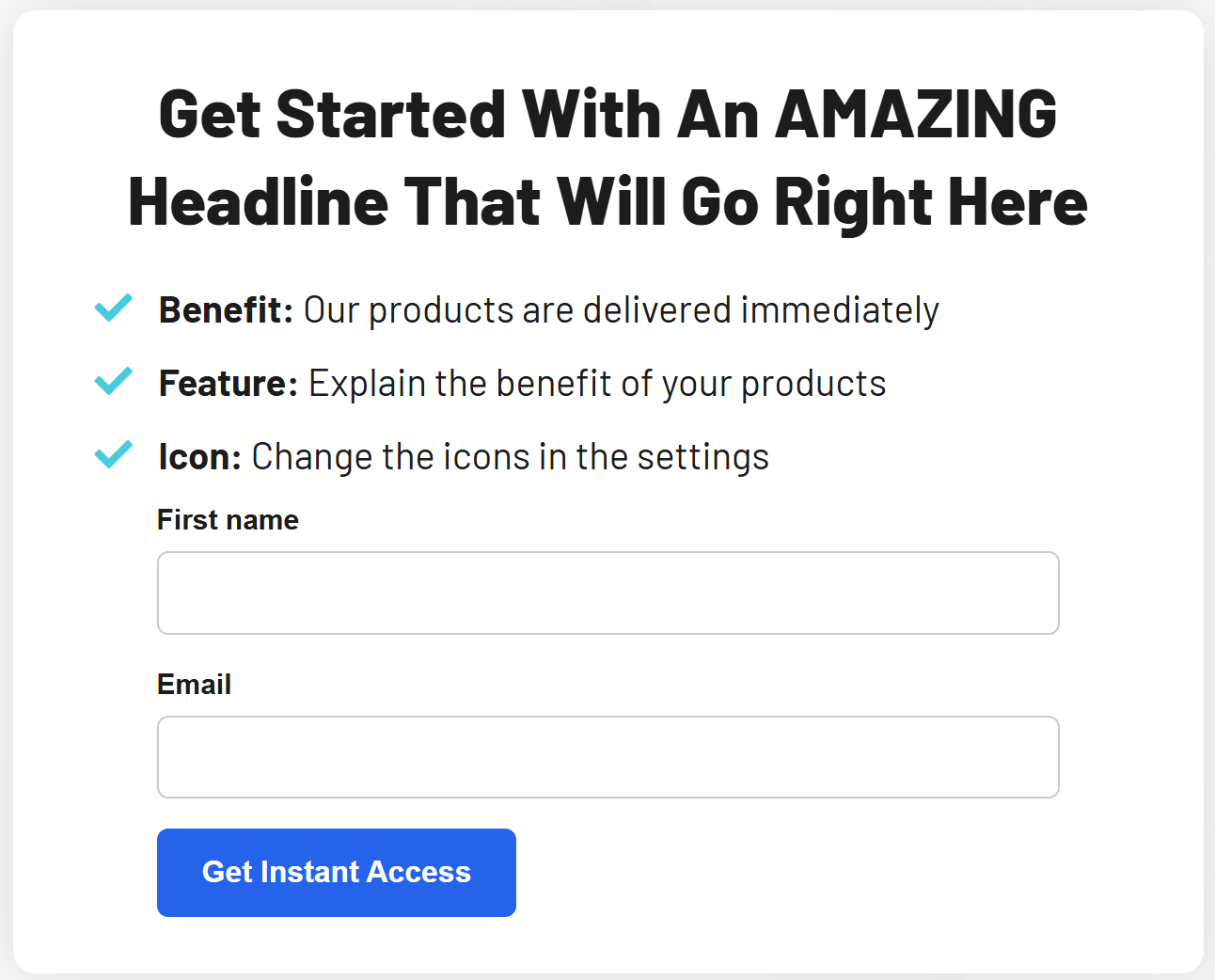
You should see: Your live page shows the First name and Email boxes and a blue Get Instant Access button.
Why delete the page's own fields?
They send sign-ups straight to ClickFunnels, so bots could still use them to skip SpamKill.
Test it twice
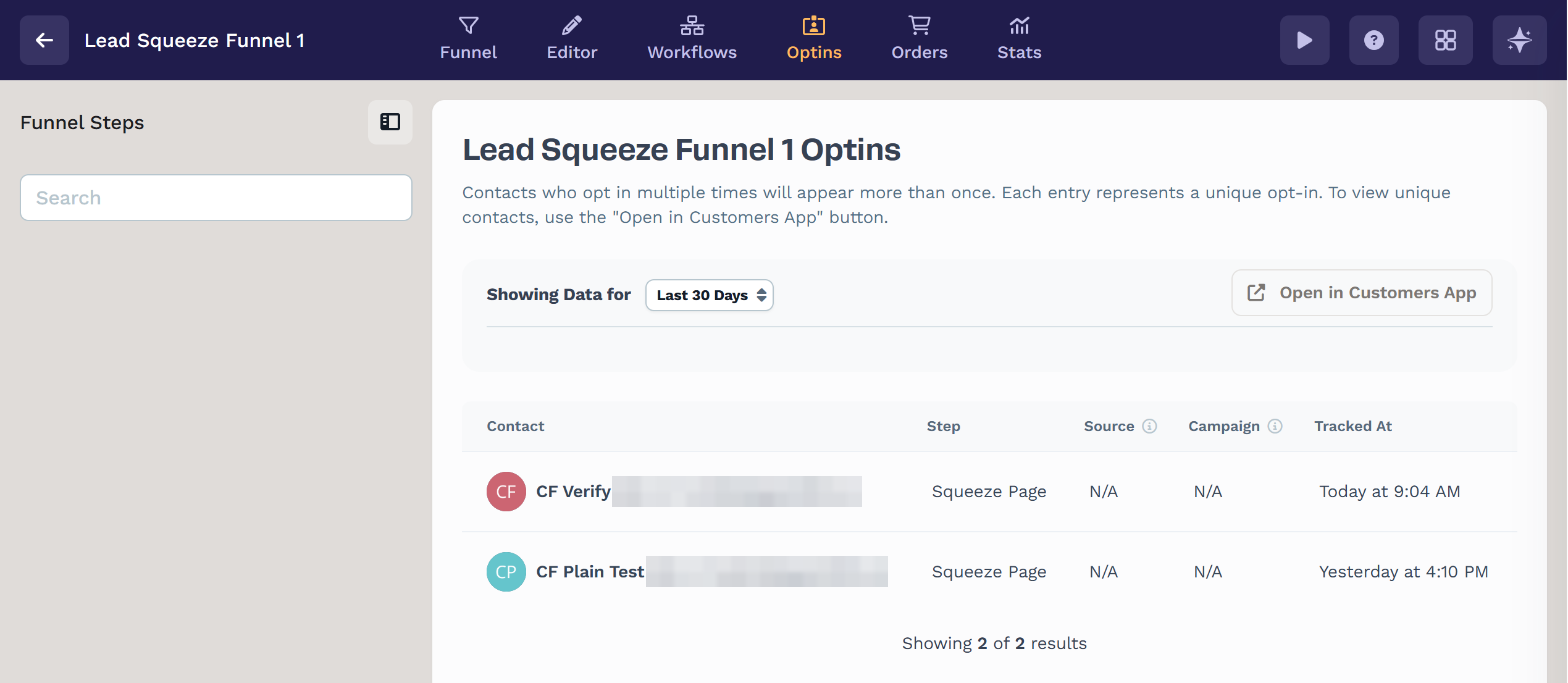
Open your page in a private window. Submit the form with [email protected] (1). Then submit it again with your own first name and email. ClickFunnels shows your thank-you page, and the sign-up appears on your funnel's Optins tab (2), on your opt-in step (3).
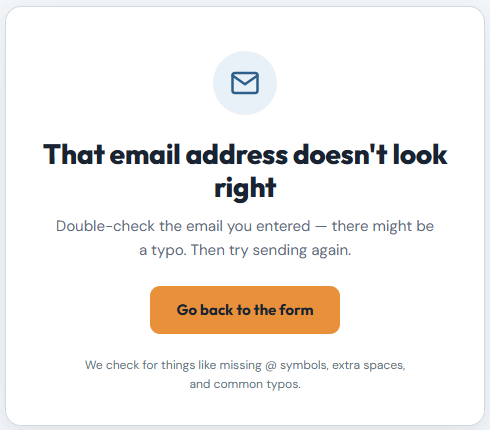

The first try shows That email address doesn't look right.
The second try appears on your funnel's Optins tab.
Back in the wizard, click Both Tests Passed.
You should see: Your funnel's thank-you page after the second try.
Signed out of ClickFunnels after a test?
Submitting the form in the browser you use for ClickFunnels can sign you out. Sign back in, and run your tests in a private window.
Your ClickFunnels form is protected
- Bots are stopped before they reach ClickFunnels.
- Real leads arrive exactly as before, with no extra steps for them.
- Every block is logged in your SpamKill dashboard.
Something not working?
Find what you're seeing.
Visitors are told the form isn't accepting submissions
SpamKill shows This form isn't accepting submissions right now when your SpamKill plan doesn't cover the page's domain. Make sure your ClickFunnels domain, such as yourname.myclickfunnels.com, is one of the domains on your SpamKill plan, then submit again.
The form submits, but no opt-in appears in ClickFunnels
Check the address after action= in step 2 is your opt-in page's full address, with the right path. If it was wrong, fix it and repeat steps 3 to 5.
The form shows plain boxes
The <style> block from step 2 is missing. Check that you pasted the whole protected code, starting with <style>, into the HTML / JS element.
A real visitor was told their email doesn't look right
SpamKill checks for missing @ symbols, extra spaces and common typos. The visitor can click Go back to the form, fix the address and send again.
I signed out of ClickFunnels after testing
That happens when you submit the form in the browser that's signed in to ClickFunnels. Sign back in, and test in a private window.
Changed your mind? Undo in under a minute
- Open your opt-in page in the ClickFunnels Editor.
- Delete the CUSTOM JAVASCRIPT / HTML element, then add the opt-in fields back from the element panel's Form section: an Input for the email and a Button that submits the form.
- Click Save. Your page is back to collecting opt-ins on its own.
Thanks! Glad your form is protected.
Sorry about that. Tell us which step tripped you up and we'll fix the guide.
Stuck? We'll set it up with you.
Free setup help for every plan. Send us a message and we'll walk through your ClickFunnels form with you.
Get setup help