Protect your MailerLite form from bots
In short: To stop spam on a MailerLite signup form, build the form once in the SpamKill Form Builder, connect MailerLite with an API token, and paste the SpamKill form on your page in place of MailerLite's embed. SpamKill checks every signup without a CAPTCHA, and real subscribers still land in your groups. It takes about 10 minutes.
Bots are signing up to your MailerLite list with fake addresses. Build your signup form once in SpamKill and connect MailerLite. Real subscribers keep landing in the groups you pick, and your double opt-in setting still applies. It takes about 10 minutes.
- 7 steps
- About 10 min
- Copy and paste one snippet
Last verified on MailerLite (trial) with SpamKill Forms
What changes, and what doesn't
- Subscribers still arrive in MailerLite, in the groups you pick
- Your groups, automations and existing subscribers
- Your double opt-in setting for API and integrations
- A SpamKill form on your page, with the fields you choose
- Every signup is checked before it reaches MailerLite
- Undo it anytime by putting your MailerLite embed back
Before you start
Have these ready so nothing stops you halfway.
- A SpamKill accountNo account yet? Start a free trial.
- A MailerLite login that can create API tokensYou create a token once, under Integrations › API.
- The group your subscribers should joinSpamKill lists your existing groups and never creates one. Create it first under Subscribers › Groups.
- Access to the page your form goes onFor example your WordPress, Webflow or Squarespace editor, where MailerLite's embed code is pasted today.
Quick setup
For returning users. Each line links to its full step.
- In SpamKill, open Form Builder and click Create form. Step 1
- On the Build tab, add the same fields your MailerLite form has. Step 2
- In MailerLite, open Integrations › API, click Generate new token, and copy the token. Step 3
- On the Deliver tab, click Connect on MailerLite, paste the token and click Connect. Step 4
- Click Use this on MailerLite, then check each field is matched to a MailerLite field. Step 5
- Pick a group, click Save mapping, send a test lead, then click Publish form. Step 6
- Copy the code from the Embed tab and paste it where MailerLite's embed code was. Step 7
Create your SpamKill form
Where: SpamKill ConsoleForm BuilderForms
In the SpamKill Console, click Form Builder in the sidebar, then Create form. Pick the starting point closest to your MailerLite form (1). Give the form a name and pick your website under Subscription. Click Create (2).
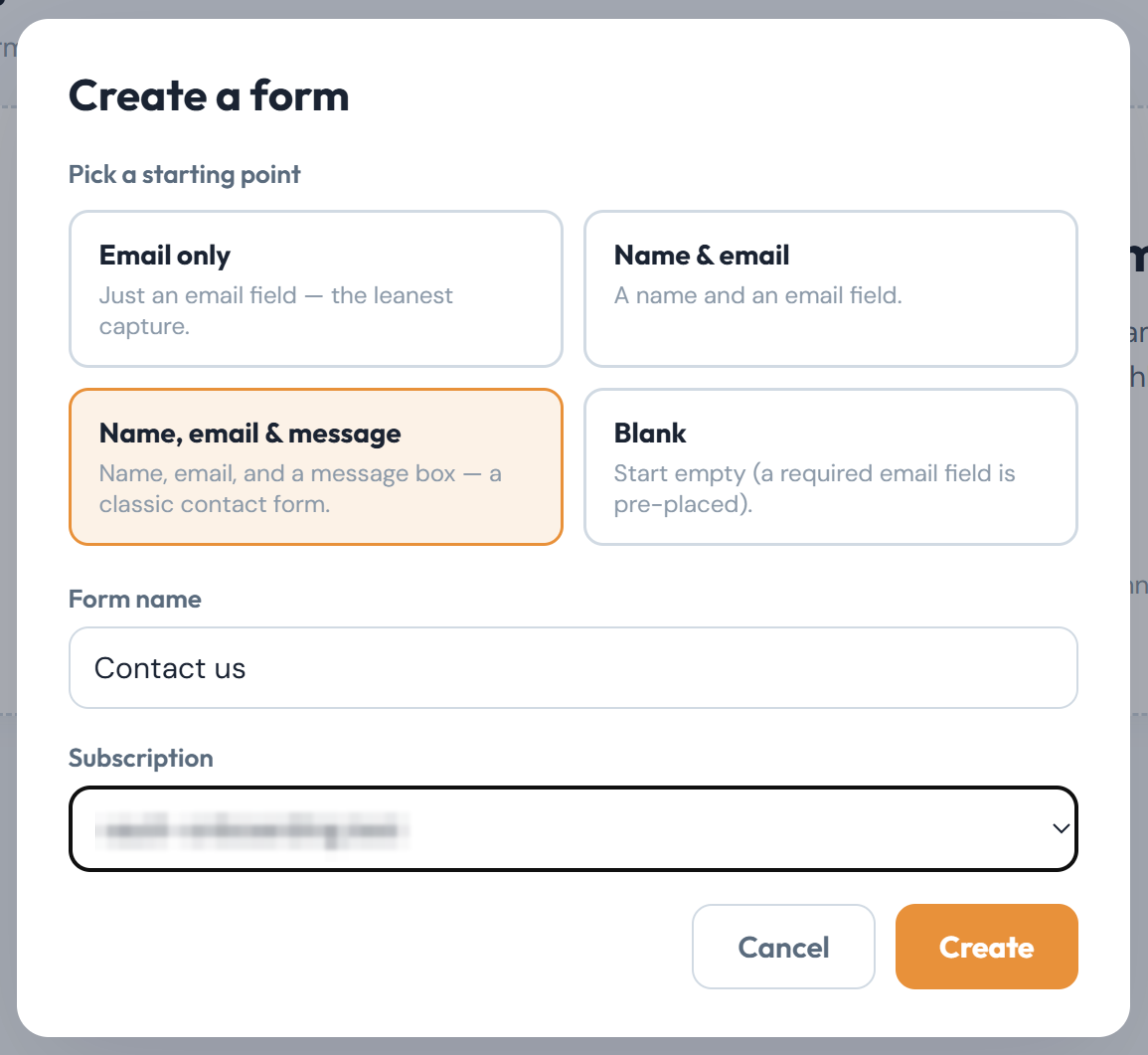
You should see: Your new form open on the Build tab, marked Draft.
Match your MailerLite fields
Where: Form BuilderYour formBuild
Add each field your MailerLite form asks for from Common fields (1). Reorder or remove fields in your form (2). Every form keeps one required Email field.
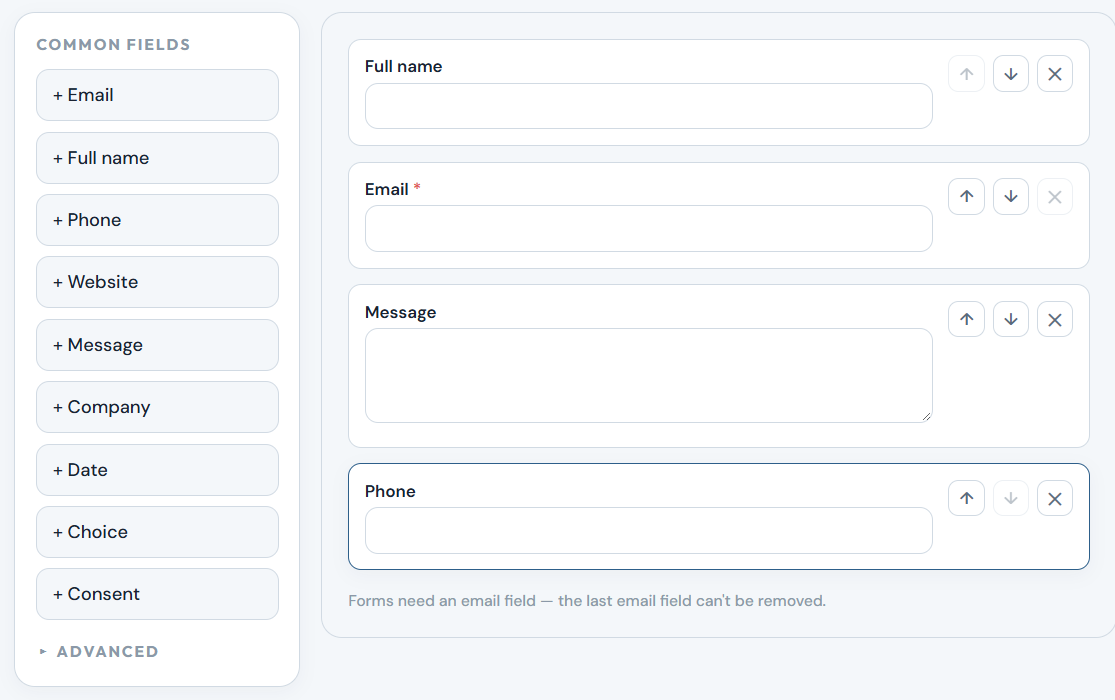
You should see: The same fields as your MailerLite form. Changes save on their own.
Want it to look like your old form?
Use the Design tab to pick colours, font and label position. Style changes apply when you publish.
Create a MailerLite API token
Where: MailerLiteIntegrationsAPI
In MailerLite, open Integrations and go to API. Click Generate new token. Name the token, for example SpamKill (1). Leave All IPs allowed selected, tick the box to accept the API terms, and click Create token (2). Copy the token MailerLite shows you.
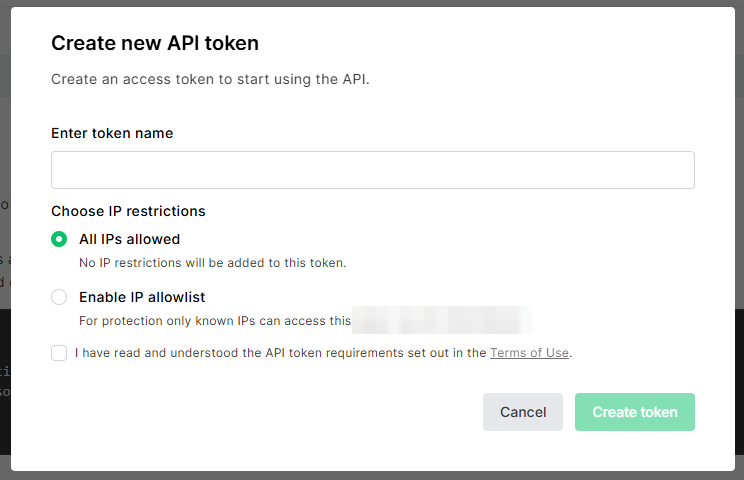
You should see: A new token on your clipboard, and it listed under API tokens.
Is the token tied to me?
Yes, to the MailerLite user who creates it. If that token is deleted later, SpamKill holds new leads and asks you to reconnect with a new one.
Connect MailerLite
Where: Form BuilderYour formDeliver
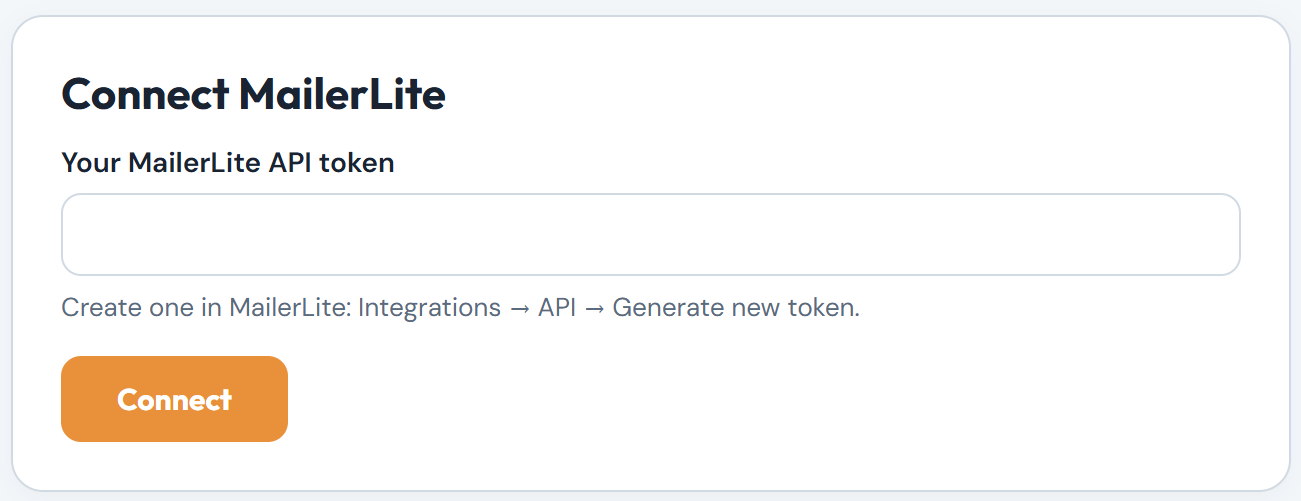
Open the Deliver tab. Under Add a CRM, click Connect on MailerLite (1). Paste your token into Your MailerLite API token (2), then click Connect (3).
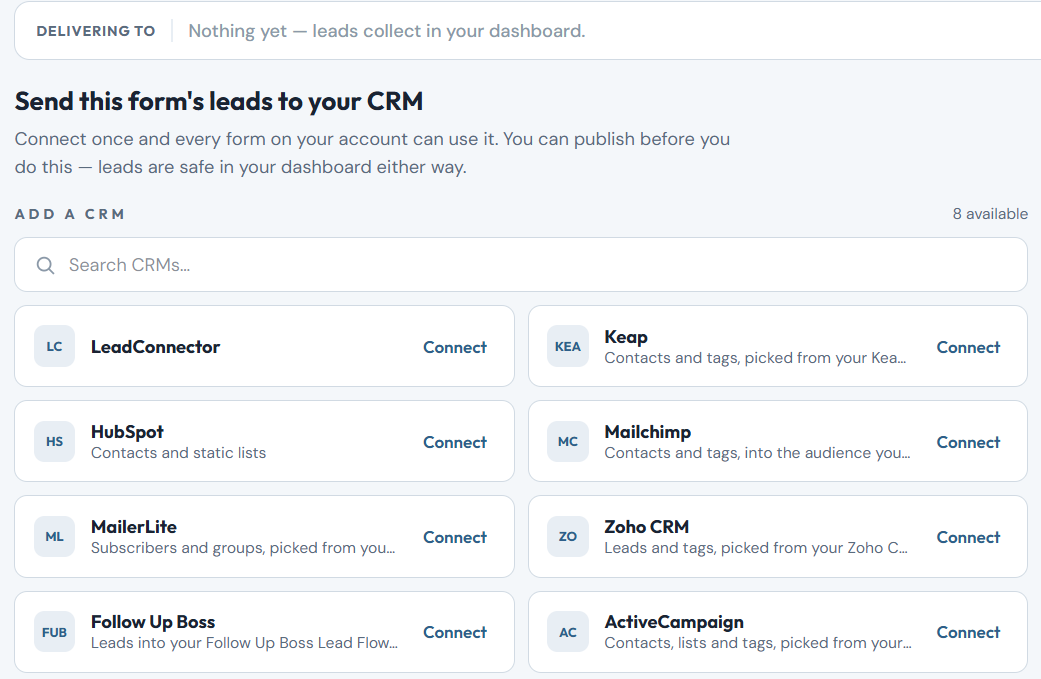
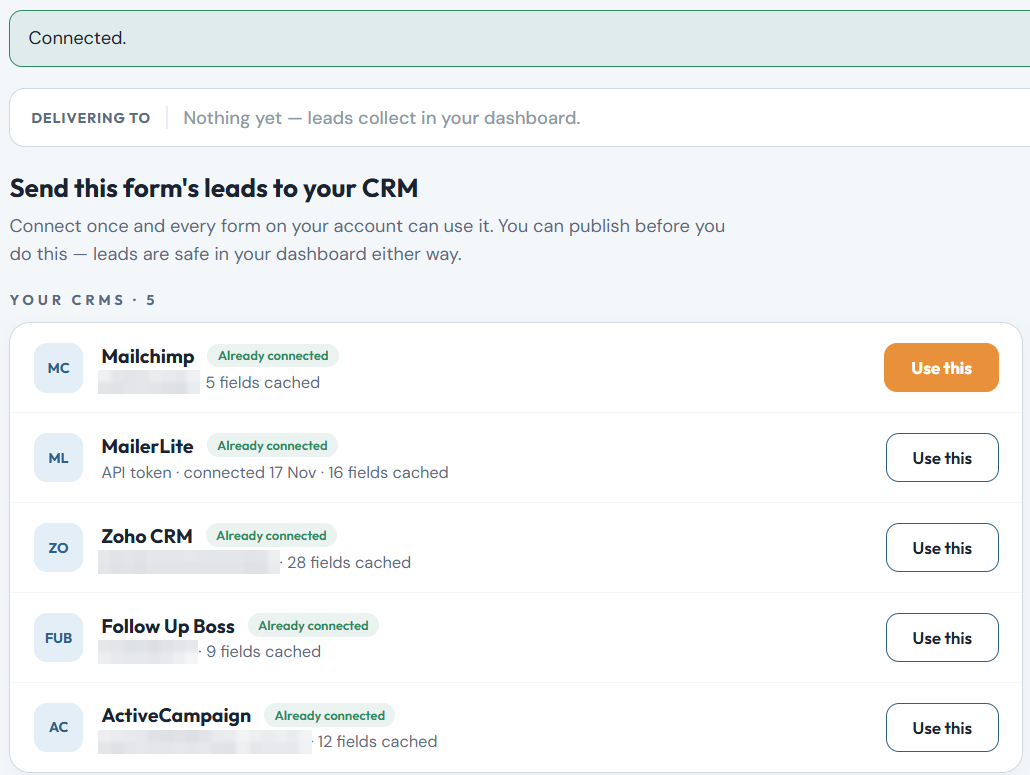
You should see: Back on the Deliver tab, a green Connected. message, and MailerLite under Your CRMs marked Already connected.
Check the field mapping
Where: Form BuilderYour formDeliver
Click Use this on MailerLite (1). SpamKill matches most fields for you and splits Full name into first and last name (2). Look over anything under Needs a quick look (3) and pick the MailerLite field it belongs in. MailerLite has no field for a message, so Message stays Not sent unless you create one in MailerLite.
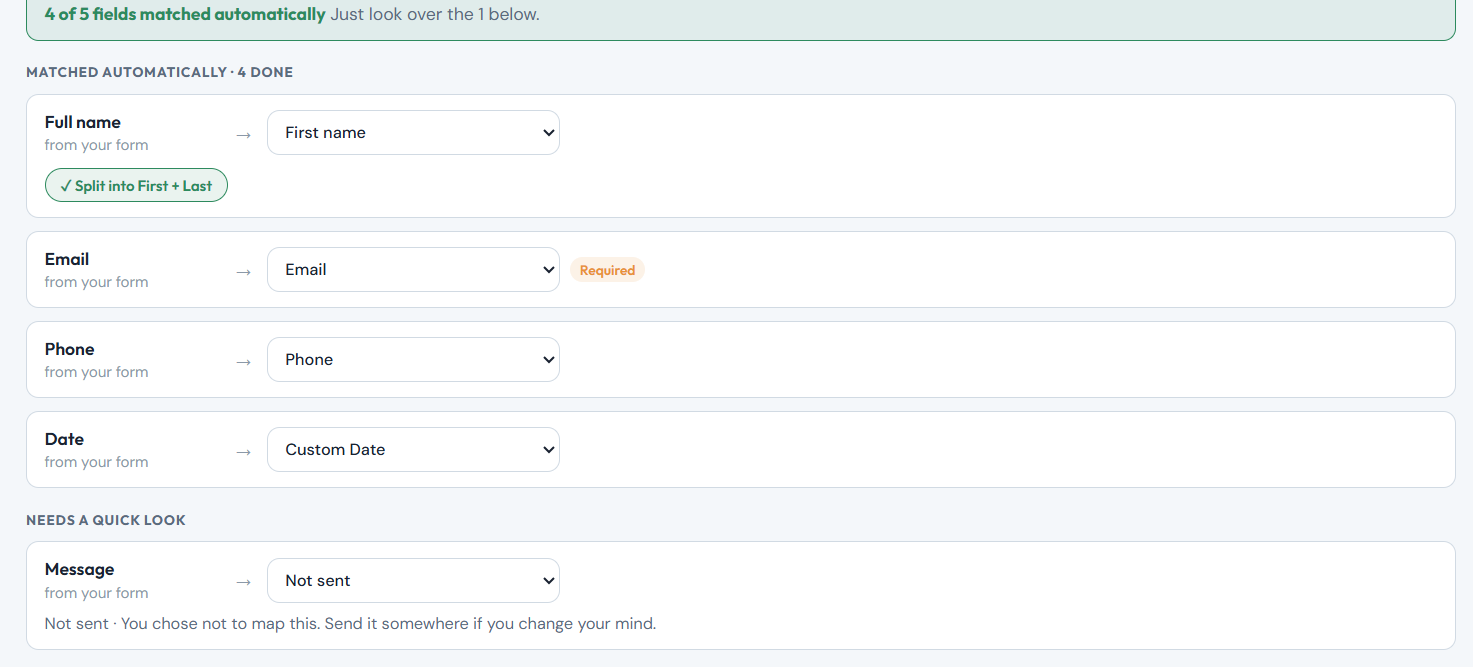
You should see: Delivering to MailerLite at the top, and every field matched or set to Not sent.
See fields like Total spent or Orders count?
Those are MailerLite's e-commerce fields. Leave them unmapped.
Pick a group, test and publish
Where: Form BuilderYour formDeliver
Under Groups, pick the group new subscribers should join (1). Click Save mapping. Click Send a test lead to this CRM (2) and check the subscriber in MailerLite. Then click Publish form.
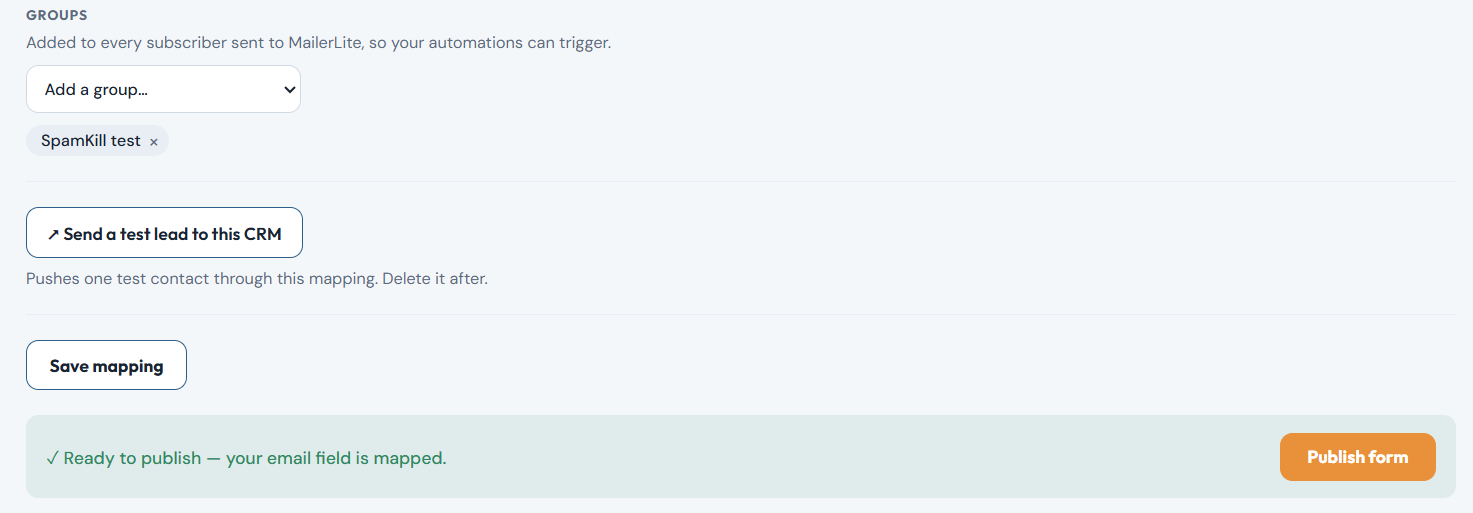
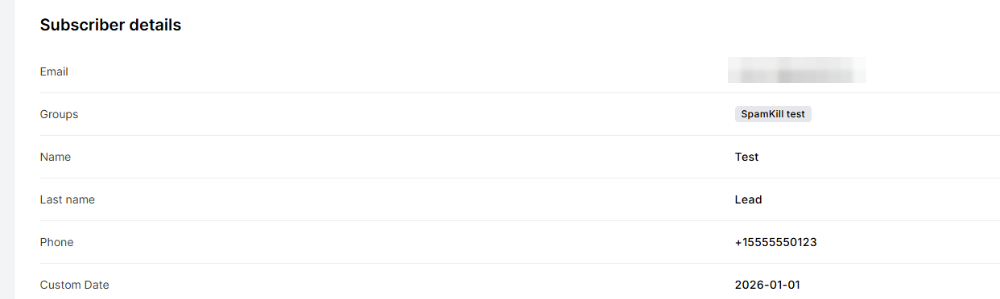
Test contact delivered to your CRM. under the test button.
A subscriber with your own email address under Subscribers, in your group.
You should see: The form's badge changes from Draft to Published.
Which email does the test subscriber use?
The one you sign in to SpamKill with. Delete the test subscriber in MailerLite when you're done.
Swap the form on your page
Where: Form BuilderYour formEmbed
On the Embed tab, click Copy (1). Open the page with your MailerLite form in your website editor. Delete MailerLite's embed code and paste the SpamKill code in its place. Save and publish the page.
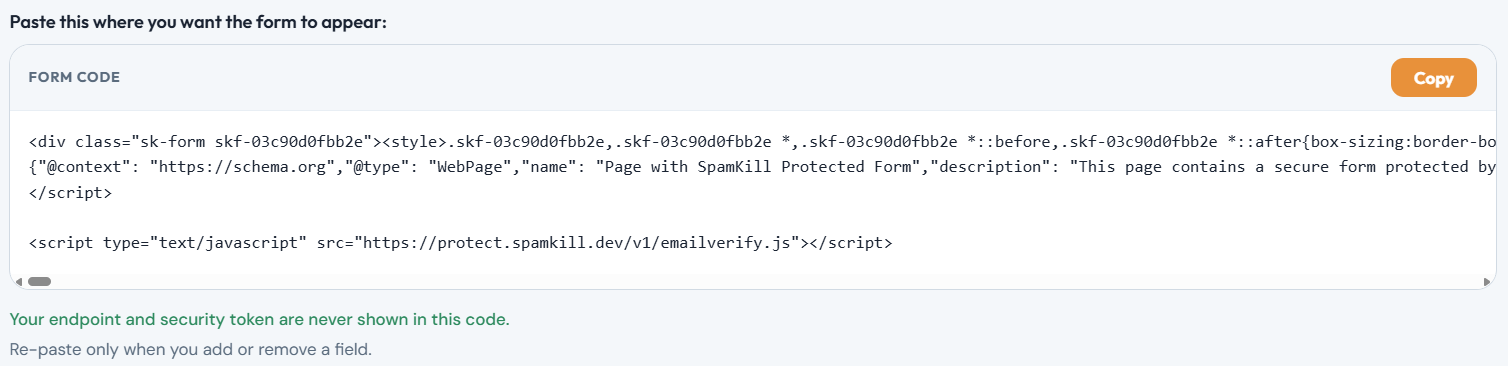
You should see: Your page shows the SpamKill form with your fields, in place of the MailerLite form. Sign up once with your own address to check it arrives in MailerLite.
Changed a field later?
Re-paste the code only when you add or remove a field. Other changes apply when you click Update & re-publish.
Your MailerLite form is protected
- Bots are stopped before they reach MailerLite.
- Real leads arrive exactly as before, with no extra steps for them.
- Every block is logged in your SpamKill dashboard.
Something not working?
Find what you're seeing.
New subscribers are Unconfirmed, not Active
Your account asks new subscribers from integrations to confirm by email, and SpamKill follows that. To change it, in MailerLite open Account settings › Subscribe settings and turn off Double opt-in for API and integrations.
A lead shows as Failed because the person unsubscribed
MailerLite won't accept someone who unsubscribed, so SpamKill doesn't sign them up again. Their submission is still kept under the form's Leads tab.
I don't see a Reconnect button
A working connection has none. It appears when the connection needs it, for example after its token is deleted in MailerLite. Then reconnect with a new token from the same MailerLite account. Leads held in the meantime are sent once it's back.
My group isn't in the list
SpamKill only lists groups that already exist. Create it in MailerLite under Subscribers › Groups, then click Refresh fields on the form's Deliver tab.
A field is missing from the subscriber
Create it in MailerLite under Subscribers › Fields, then click Refresh fields on the form's Deliver tab and map it. Text, number and date fields can be mapped.
Changed your mind? Undo in under a minute
- Open the page in your website editor.
- Delete the SpamKill code and paste your MailerLite embed code back.
- Save and publish the page. Your MailerLite form is back to how it was.
- Optional: in MailerLite, delete the token you made for SpamKill under Integrations › API.
Thanks! Glad your form is protected.
Sorry about that. Tell us which step tripped you up and we'll fix the guide.
Stuck? We'll set it up with you.
Free setup help for every plan. Send us a message and we'll walk through your MailerLite form with you.
Get setup help